Installing Nav Hack in Lexus GS
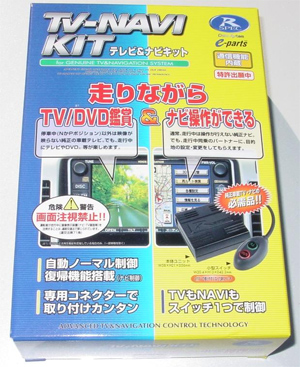
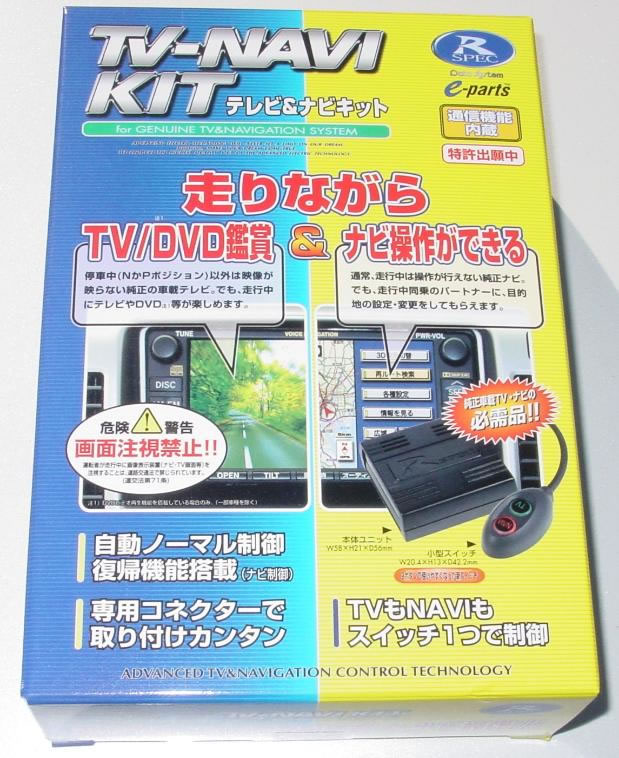
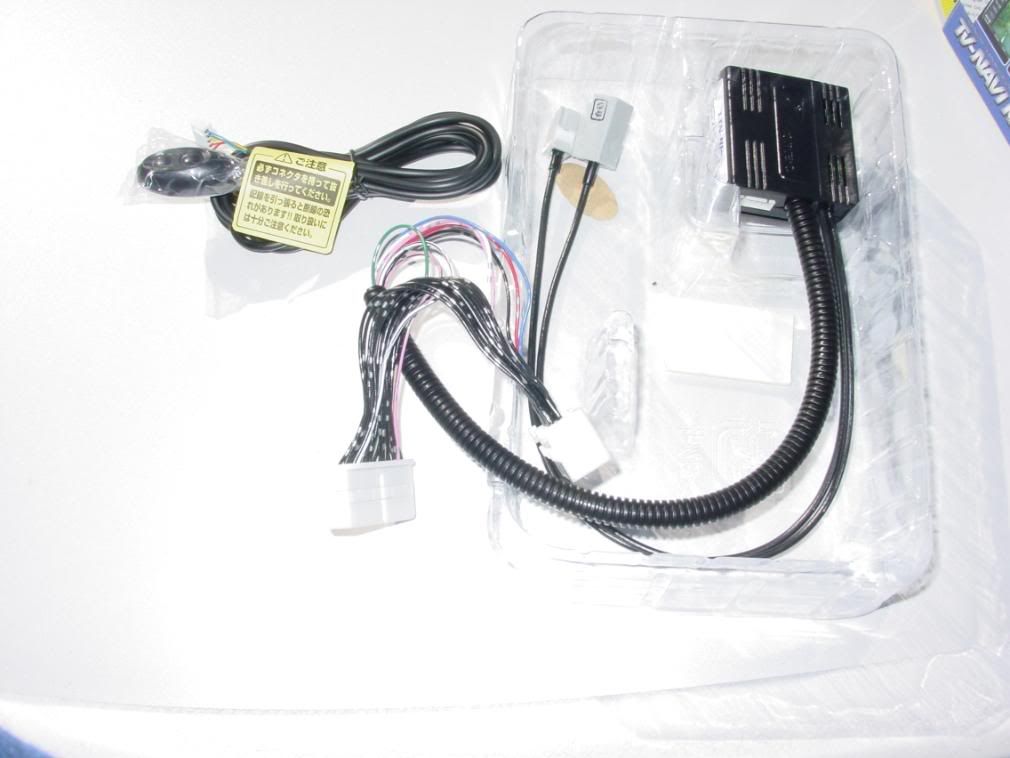
What: Plug-n-Play kit from Japan market for allowing DVD playback, all NAV features (entering address, POI, etc), and CD Changer track/playlist access while vehicle is in motion.
Who: Kit is made by Data System of Japan / R-Spec - http://www.datasystem.co.jp
For: 2007 Lexus G350, GS430, GS450h with Navigation and ML Sound System (for DVD playback feature to work)
Cost: Contact <sales "at" prestigioussociety.com> for more information.
Why Use It?: This kit is useful for people who want a plug-n-play solution or who are not willing to perform the wire-cutting mods to their cars. The kit will cost more than the DIY wire-cutting mod, but for some this is an acceptable trade-off.
Test Results: The unit performs as advertised by Prestigious Society from all the tests I could think to run. These covered everything from watching DVD's while in motion and using DVD on-screen controls, using CD changer features like playlist details and track names while in motion, and entering address and POI queries from the NAV systm while the car was in motion.
Installation Time: Roughly 20 minutes from start to end.
Installation Tools: #2 Philips, small flat screwdriver, 10mm socket with 3" extension (for radio removal), needle-nose pliers
Installation Overview:
1. Remove interior trim and pull out radio.
Pulling Nav Unit from Lexus GS to get access to the back of the nav
You will need a small flat head screw driver, a phillip head screw driver, a 10mm socket and a towel to protect the navigation unit.
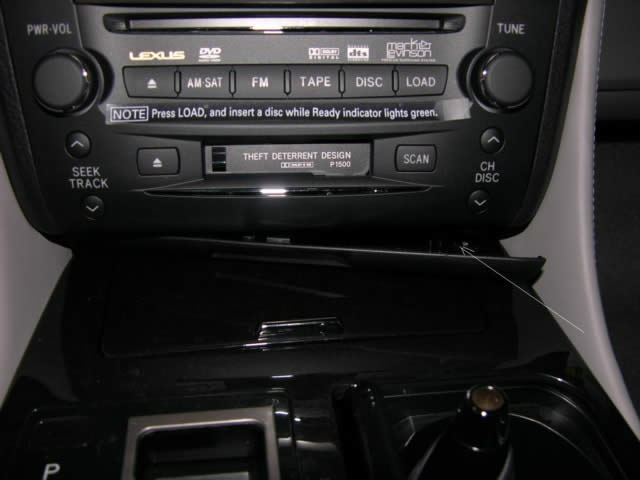
First, remove the plastic trim underneath the nav( just right above the ashtray) by pry it out with a small flat head screw driver.
Hint: Tape the screw driver with Scotch tape to protect the finish of the trim.
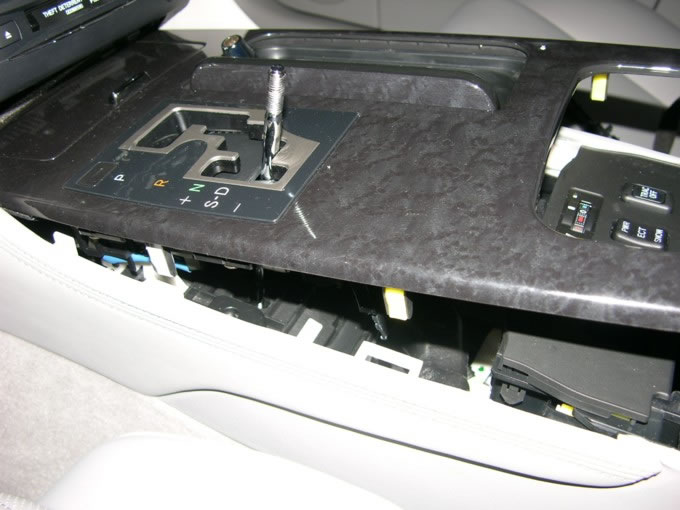
Second, put the shifter into "D" position. DO NOT START THE CAR. Just press the start buttom twice( foot of brake pedal at this time) and put the shifter to " D" or you can remove the shift lock tab and press the buttom, so you can move the shifter to " D"
Unscrew the shifter and pry up on the center console.
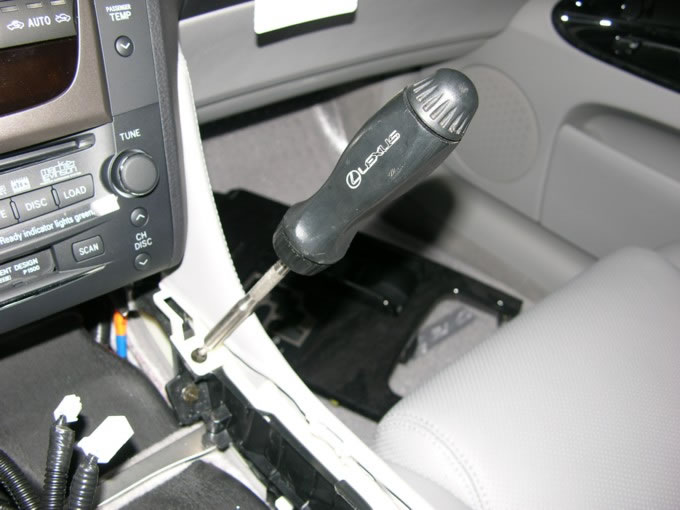
Third, remove the phillip head screw on each side of the side cover and the pry out.
Gently remove both covers.
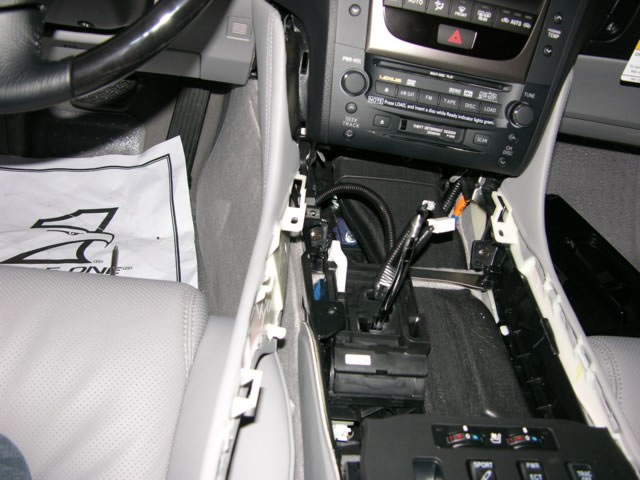
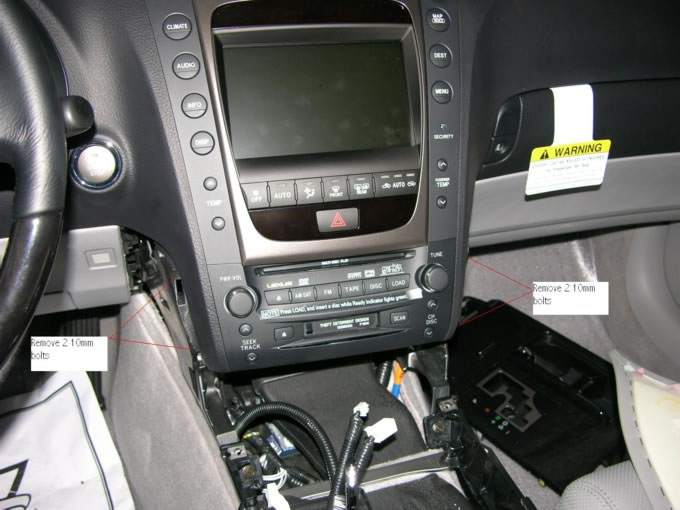
After that you will see 4 10mm bolts( 2 on each side). Remove those bolts from the nav screen bracket and remove the nav unit.
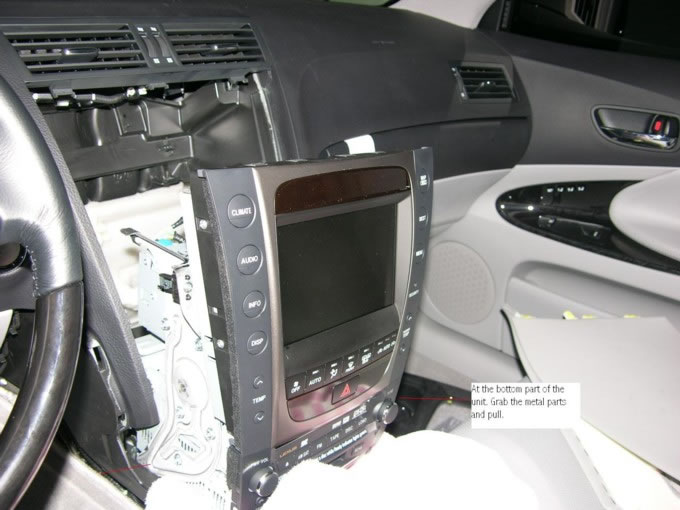
If you look under the nav unit you will find a piece of metal bracket on each side to grab onto and pull it out. Do not pry on the side of the Nav unit or try to remove the AC vent.
One more. Oh, the AC vent is part of the dash. If you attemt ot remove it...
you will have yourself a new dash.
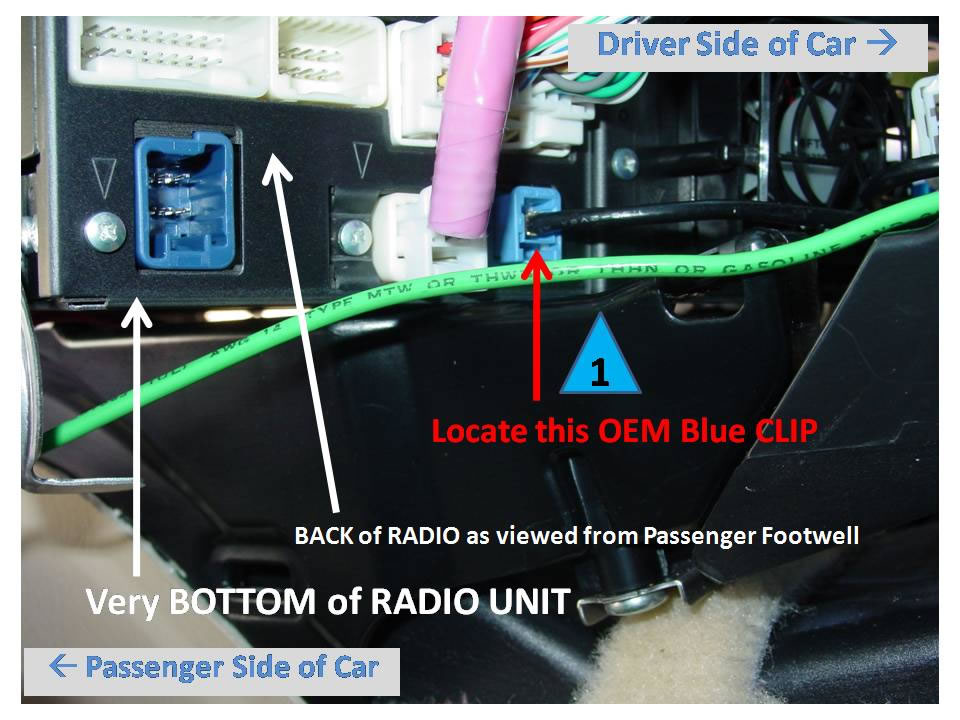
2. Remove OEM signal wire (blue clip in photos below) and insert into gray bypass harness from new override kit. Refer to blue triangles 1, 2 & 3 in photos below. Due to tight fit, you may need to use needle-nose pliers to firmly insert new gray bypass harness kit wire block into back of OEM radio unit (see location near triangle # 3).
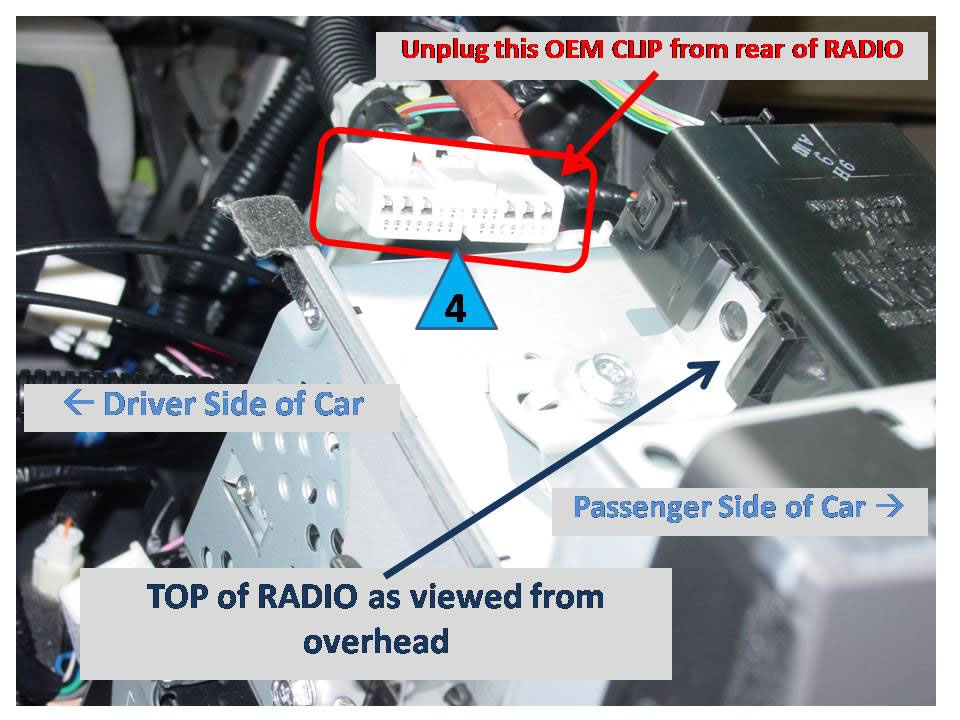
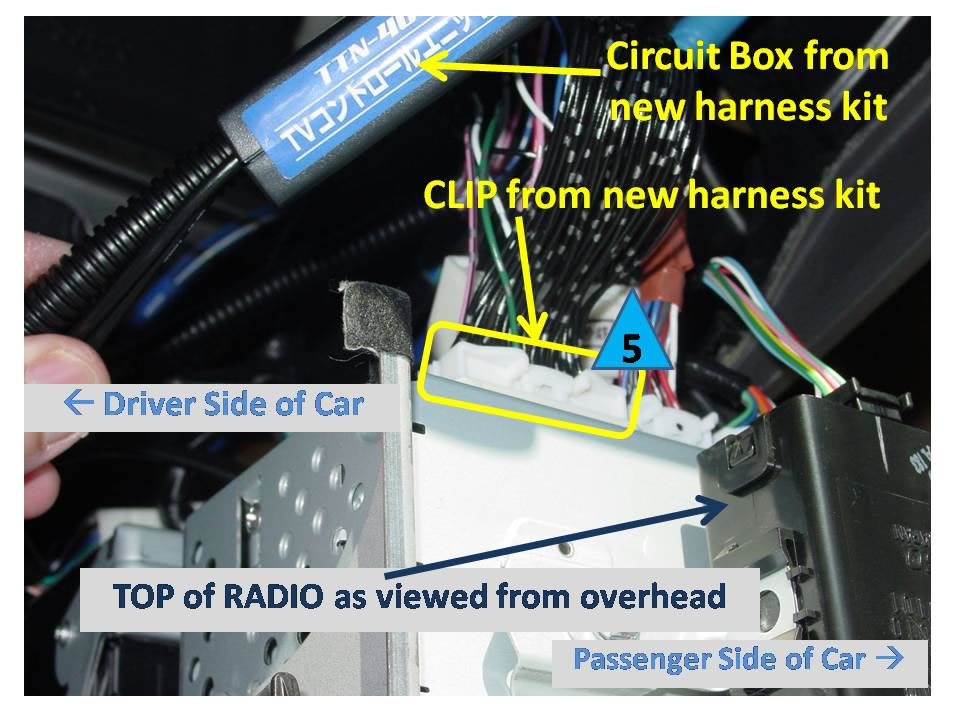
3. Remove OEM Navigation / DVD harness from back of radio and insert into white bypass harness from new override kit. Refer to blue triangles 4 & 5 in photos below.
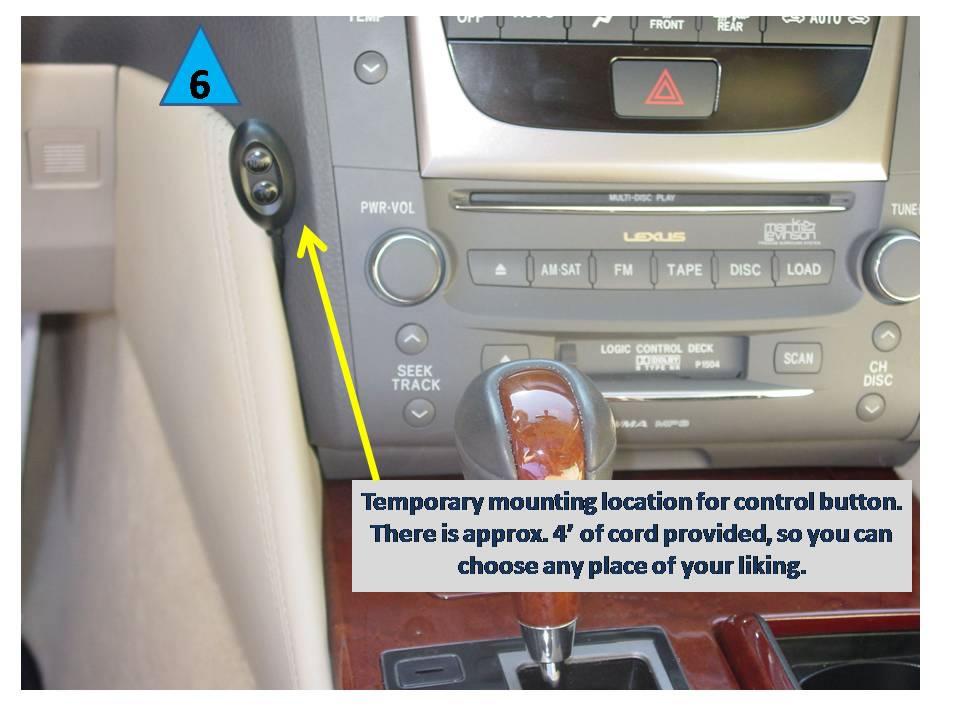
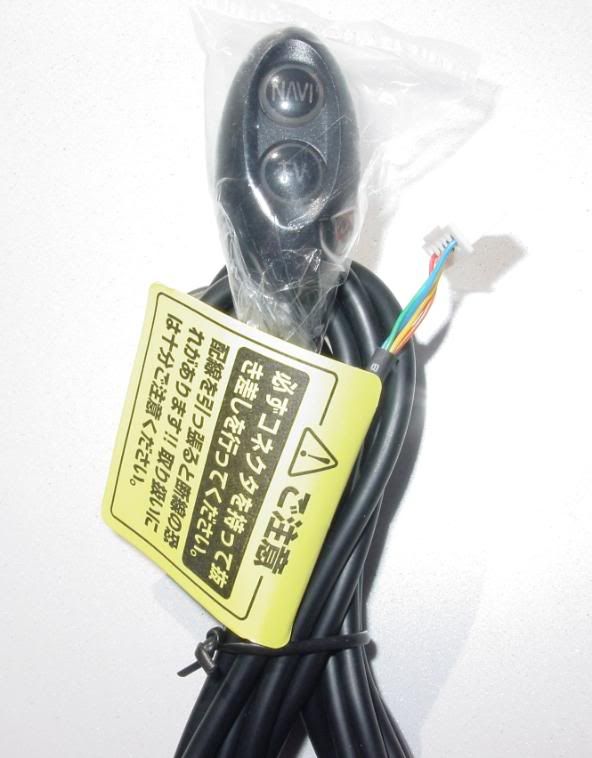
4. Insert button control wire from new kit into override circuit block and decide on mounting location for your car. Refer to blue triangle 6 in photo below.
5. Reverse removal procedures and re-install your radio and trim pieces.
6. Enjoy access to all radio CD Changer / DVD playback, and NAV system features while in motion.
Operation: Press TV button to view DVD while in motion. Press NAVI button to access locked-out CD radio and Navigation features while in motion. GPS route tracking may not be accurate while this button is active. Press NAVI a second time to return to locked-out state and restore full GPS tracking (takes 8-10 seconds to return to normal). As a side feature, NAVI button turns off automatically after 5 minutes of activation.
Installation Pictures:
Related Pictures:
Copied from http://www.clublexus.com/forums/showthread.php?t=317601 to make it easier to see all the data in one place and to print it for use in the garage